
Oster Waffle Maker Instructions: A Comprehensive Guide
Oster appliances consistently deliver delicious results, offering culinary confidence for a century, from clippers to modern kitchen innovations like waffle makers.
This guide provides detailed instructions for various Oster waffle maker models, ensuring perfect waffles every time, with safety and maintenance tips included.
Explore techniques for achieving desired textures, troubleshooting common issues, and discovering inspiring recipes to elevate your waffle-making experience with Oster.
Understanding Your Oster Waffle Maker
Oster waffle makers are designed for ease of use and consistent results, becoming a staple in many kitchens for over a century. These appliances range from classic, simple models to more advanced Belgian waffle makers and even those integrated into larger air fryer oven combinations.
Familiarizing yourself with the specific components of your model is crucial. Generally, you’ll find non-stick cooking plates, a housing containing the heating elements, indicator lights to signal preheating and readiness, and often, adjustable browning controls. The Oster Extreme Mix Blender’s durable Boroclass glass jar exemplifies the brand’s commitment to quality, a principle extended to their waffle makers.
Understanding these basic elements will help you navigate the instructions and achieve perfectly cooked waffles. Whether you’ve chosen a traditional or a French door style, knowing your waffle maker’s features is the first step to enjoying delicious homemade waffles.
Model Variations and Features
Oster offers a diverse range of waffle makers to suit various preferences and kitchen setups. The Classic Oster Waffle Maker provides a traditional waffle experience, while the Stainless Steel model boasts a sleek, modern aesthetic and enhanced durability. For those craving thicker, fluffier waffles, the Oster Belgian Waffle Maker is an excellent choice.
More recently, Oster has integrated waffle-making capabilities into multi-functional appliances like the Extra-Large French Door Air Fryer Countertop Oven, offering versatility and space-saving convenience. These models often include features like faster preheating and energy-efficient operation, reducing cooking time by up to 50% compared to conventional ovens.
Common features across models include adjustable browning controls, non-stick plates for easy cleaning, and indicator lights. Understanding the specific features of your model is key to maximizing its performance and enjoying consistently delicious results.
Safety Precautions Before First Use
Before operating your Oster waffle maker, carefully review all instructions to ensure safe and optimal performance. Always inspect the appliance and power cord for any damage. Do not use if damaged, and avoid using extension cords. Ensure the waffle maker is placed on a stable, heat-resistant surface away from flammable materials.
Never immerse the appliance in water or any other liquid. The exterior surfaces can become hot during use, so avoid touching them directly. Supervise children closely when the waffle maker is in operation. Always unplug the appliance from the electrical outlet when not in use and before cleaning.
The Oster Extreme Mix Blender’s Boroclass Glass Jar is shatterproof, but similar caution should be exercised with any hot appliance. Prioritizing these safety measures will guarantee a secure and enjoyable waffle-making experience.
Getting Started: Initial Setup
Begin by carefully unboxing your Oster waffle maker, verifying all components are present. A thorough cleaning before first use is essential for optimal performance.
Unboxing and Component Check

Carefully remove your new Oster waffle maker from its packaging, ensuring you retain the box and packing materials for potential future use or warranty claims. A complete component check is the first crucial step. Verify the presence of the waffle maker unit itself, and confirm that the user manual is included – this manual contains vital safety information and operating instructions.
Inspect the non-stick plates for any shipping damage; scratches or defects should be reported immediately to the retailer. Check for any loose parts or visible flaws in the exterior housing. Some models may include additional accessories, such as batter dispensing cups or specialized cleaning tools; ensure these are also present; Familiarize yourself with the location of the power cord and any detachable parts. A thorough unboxing and component check guarantees you have everything needed for a successful waffle-making experience and identifies any potential issues upfront.
Cleaning Before First Use
Before enjoying your first batch of golden waffles, a thorough cleaning is essential to remove any manufacturing residues or dust accumulated during shipping. Unplug the waffle maker and allow it to cool completely. Gently wipe down the exterior housing with a damp, soft cloth – avoid abrasive cleaners that could damage the finish.
The non-stick plates require special attention. Use a soft, damp cloth or sponge with mild dish soap to carefully clean the surfaces. Avoid using metal utensils or scouring pads, as these will scratch and compromise the non-stick coating. Rinse thoroughly with a clean, damp cloth, ensuring all soap residue is removed. Dry all components completely before proceeding to the powering-on stage. This initial cleaning ensures a safe and hygienic waffle-making experience.
Powering On and Indicator Lights
Plug your Oster waffle maker into a grounded electrical outlet. Most models feature indicator lights to signal the unit’s status. Typically, a “Power” light illuminates to confirm the appliance is receiving electricity. A separate “Ready” or “Preheat” light indicates when the waffle maker has reached the optimal cooking temperature.
Allow the waffle maker to preheat fully – the “Ready” light will usually change color or turn off when ready. Some advanced models may have digital displays showing the temperature or a countdown timer. Refer to your specific model’s manual for detailed light interpretations. Never attempt to pour batter before the unit is fully preheated, as this will result in sticking and unevenly cooked waffles. Proper preheating is crucial for achieving consistently delicious results.
Making Perfect Waffles: Step-by-Step
Achieve golden, fluffy waffles by following a simple process: prepare batter, preheat the maker, pour, and cook until perfectly browned and delightfully crisp.
Preparing the Waffle Batter
Creating the perfect waffle batter is fundamental to achieving delicious results with your Oster waffle maker. Begin with a basic recipe, typically involving flour, sugar, baking powder, salt, eggs, and milk – adjust quantities based on desired sweetness and texture.
Ensure all ingredients are properly measured for consistency. Whisk dry ingredients thoroughly before incorporating wet ingredients to prevent lumps. Avoid overmixing, as this can develop gluten, resulting in tougher waffles. A slightly lumpy batter is preferable to an overly smooth one.
For enhanced flavor, consider adding vanilla extract, cinnamon, or a touch of nutmeg. Melted butter incorporated into the batter contributes to a richer taste and golden-brown color. Remember, batter consistency should be pourable but not too thin – adjust milk quantity accordingly.
Allowing the batter to rest for 5-10 minutes before cooking allows the gluten to relax, yielding lighter, fluffier waffles. Experiment with different recipes to discover your personal preference!
Preheating the Waffle Maker
Proper preheating is crucial for consistently golden and crispy waffles with your Oster waffle maker. Before pouring any batter, ensure the unit is adequately heated – this prevents sticking and ensures even cooking.
Plug in your waffle maker and allow it to heat up according to the manufacturer’s instructions, typically indicated by a ready light. Most Oster models feature indicator lights to signal when the optimal temperature is reached. Do not attempt to cook waffles before this light illuminates.
Initial preheating can take several minutes, varying depending on the model. Some advanced Oster waffle makers boast faster preheating capabilities, reducing overall cooking time and energy consumption.
A well-preheated waffle iron creates a non-stick surface, allowing for easy waffle removal. If the first waffle sticks, allow the maker to heat for a few more minutes before proceeding.
Pouring the Batter and Cooking Time
Once the waffle maker is preheated and the indicator light signals readiness, carefully pour the waffle batter onto the lower plate. Avoid overfilling; use the amount recommended in your recipe or the waffle maker’s instructions – typically ½ to ¾ cup, depending on the model size.
Close the lid gently, but firmly. Do not force it shut. Excess batter may seep out during cooking, which is normal. Cooking time varies based on the waffle maker model and desired crispness.
Generally, waffles take between 3 to 5 minutes to cook. Monitor the waffle’s progress; it’s ready when the steam subsides and the waffle is golden brown. Some Oster models have adjustable browning controls for personalized results.
Avoid lifting the lid prematurely, as this can disrupt the cooking process. Use a non-metallic utensil to carefully remove the cooked waffle, preventing damage to the non-stick coating.
Advanced Techniques & Troubleshooting
Master waffle textures, conquer sticking issues, and resolve common problems like light or heating malfunctions with expert tips for your Oster waffle maker.
Achieving Different Waffle Textures
Controlling waffle texture is surprisingly simple with your Oster waffle maker! For crispy waffles, utilize a slightly thinner batter and preheat the maker thoroughly, ensuring even heat distribution. A longer cooking time also contributes to increased crispiness.
Conversely, for fluffy waffles, a thicker batter incorporating whipped egg whites is key. Reduce the cooking time slightly to prevent over-browning and maintain a soft interior. Experimenting with baking powder amounts can also influence fluffiness.
Belgian waffle makers, with their deeper pockets, naturally produce waffles with a lighter, airier texture. Adjust batter consistency accordingly – a slightly more liquid batter works best. Remember, consistent batter preparation is crucial for repeatable results, regardless of desired texture.
Don’t be afraid to experiment and find the perfect balance for your personal preference!
Dealing with Sticking Waffles
Sticking waffles can be frustrating, but are often preventable! Ensure your Oster waffle maker’s non-stick plates are adequately coated. Before the first use, and periodically thereafter, apply a light coating of cooking spray or oil – even with non-stick surfaces, this helps.
Avoid using metal utensils to remove waffles, as these can damage the non-stick coating. Opt for wooden or silicone tools instead. If a waffle does stick, gently coax it loose; forcing it will likely cause tearing and further sticking.
Proper preheating is also vital. An insufficiently heated plate increases the likelihood of sticking. If sticking persists, ensure the batter isn’t too sugary, as sugar caramelizes and adheres strongly. Thorough cleaning after each use prevents buildup that contributes to sticking.
Remember, patience is key!
Troubleshooting Common Issues (Lights, Heating)
If the power light isn’t illuminating, first verify the unit is securely plugged into a functioning outlet. Check your circuit breaker or fuse box to rule out electrical issues. If the light illuminates but the waffle maker doesn’t heat, allow sufficient preheating time – models vary.
Uneven heating can sometimes occur. Ensure the waffle maker is on a level surface. If problems persist, unplug the unit and allow it to cool completely before inspecting for any visible damage to the heating elements.
For intermittent heating, a faulty thermostat might be the culprit. Avoid attempting self-repair; contact Oster customer support for assistance. Never immerse the appliance in water. Consistent cleaning and proper storage can prevent many issues.
Always prioritize safety!
Cleaning and Maintenance
Proper cleaning extends your Oster waffle maker’s life. Always unplug and cool before cleaning non-stick plates; dishwasher-safe options simplify upkeep;
Store carefully to prevent damage, ensuring longevity and consistent, delicious waffle-making performance for years to come.
Cooling Down and Disconnecting
Before initiating any cleaning or maintenance procedures on your Oster waffle maker, safety is paramount. Always, and without exception, ensure the appliance has completely cooled down. This prevents accidental burns and potential damage to the non-stick coating.
Disconnect the waffle maker from the power outlet. Do not attempt to clean the appliance while it is still plugged in. This eliminates the risk of electric shock. Allow sufficient time for the plates to cool naturally – typically around 15-20 minutes, depending on usage.
Resist the urge to expedite the cooling process with water or other cooling agents, as this could compromise the internal components and void any warranty. Patience is key to safe and effective maintenance of your Oster waffle maker, ensuring years of delicious waffles.
Cleaning the Non-Stick Plates
To maintain the optimal performance and longevity of your Oster waffle maker, regular cleaning of the non-stick plates is crucial. Once cooled and disconnected, gently wipe away any excess batter or food residue with a soft, damp cloth or paper towel.
For stubborn residue, avoid abrasive cleaners or scouring pads, as these can damage the non-stick coating. Instead, use a mild dish soap and warm water solution. Apply gently with a soft sponge, ensuring no water enters the internal mechanisms.
If your Oster waffle maker features removable plates, they can be washed in the dishwasher, if indicated in the user manual. Thoroughly dry all components before reassembling and storing. Proper cleaning preserves the non-stick surface, guaranteeing consistently perfect waffles.
Proper Storage Techniques
Ensuring the longevity of your Oster waffle maker requires mindful storage practices. Always allow the appliance to cool completely and be thoroughly dry before storing it. This prevents potential damage and mold growth.

Store the waffle maker in a clean, dry location, away from direct sunlight and extreme temperatures. If possible, store it in its original packaging to protect the non-stick coating from scratches and dust.
For compact storage, ensure the cord is neatly wrapped and secured. Avoid placing heavy objects on top of the waffle maker, as this could cause damage. Following these simple techniques will keep your Oster waffle maker in excellent condition for years of delicious waffle-making!

Oster Waffle Maker Models Comparison
Oster offers diverse waffle makers, including Classic, Stainless Steel, and Belgian models, each with unique features and benefits for varied waffle preferences and kitchen styles.
Explore detailed reviews and instructions for each model to determine the best fit for your needs and desired waffle experience with Oster.
Classic Oster Waffle Maker Review
The Classic Oster Waffle Maker, a long-standing favorite, provides reliable performance for everyday waffle enjoyment, embodying Oster’s century-long commitment to kitchen convenience.
This model typically features non-stick plates for easy release and cleanup, alongside adjustable browning controls to customize your waffle’s golden-brown perfection.
Its simple operation makes it ideal for beginners, while its durable construction ensures longevity, offering consistent results with each use. The compact design allows for easy storage.
Users appreciate its affordability and ease of use, making it a great entry point into the world of homemade waffles. However, it may lack some advanced features found in higher-end models.
Overall, the Classic Oster Waffle Maker remains a solid choice for those seeking a dependable and straightforward waffle-making experience, delivering delicious results consistently.
Oster Stainless Steel Waffle Maker Features
The Oster Stainless Steel Waffle Maker elevates your kitchen aesthetic with its sleek, modern design, while delivering exceptional waffle-making performance, reflecting Oster’s dedication to innovation.
Key features include durable stainless steel construction for enhanced durability and a sophisticated look, alongside advanced browning controls for precise customization.
Many models boast a larger waffle surface, allowing for thicker, Belgian-style waffles, and often include indicator lights to signal preheating and readiness.
The non-stick plates ensure effortless food release and simplified cleanup, while the cool-touch housing provides added safety during operation.
This model offers a premium waffle-making experience, combining style, functionality, and Oster’s renowned reliability, making it a standout addition to any kitchen countertop.
Oster Belgian Waffle Maker Instructions
Oster Belgian Waffle Makers are designed for creating thick, fluffy waffles with deep pockets perfect for holding your favorite toppings, embodying Oster’s commitment to delicious results.
Begin by preheating the waffle maker until the indicator light signals readiness; this ensures even cooking and optimal texture. Prepare your batter according to your preferred recipe.
Pour a generous amount of batter onto the lower plate, allowing it to spread naturally – avoid overfilling to prevent overflow during cooking.
Close the lid gently and cook for the recommended time, typically 3-5 minutes, adjusting based on your desired level of browning using the control settings.
Carefully remove the waffle and enjoy! Remember to consult your specific model’s manual for detailed instructions and safety precautions.
Recipes and Inspiration
Oster waffle makers unlock endless culinary possibilities, from classic waffles to savory creations, enhancing your kitchen experience with delightful and easy-to-follow recipes.
Basic Waffle Recipe
Yields: Approximately 4 waffles
Prep time: 10 minutes
Cook time: 15-20 minutes
Ingredients:
- 1 ½ cups all-purpose flour
- 3 ½ teaspoons baking powder
- ¼ teaspoon salt
- 1 tablespoon sugar
- 1 ¼ cups milk
- 1 egg, lightly beaten
- 3 tablespoons melted butter
- 1 teaspoon vanilla extract
Instructions:
- In a large bowl, whisk together the flour, baking powder, salt, and sugar.
- In a separate bowl, combine the milk, egg, melted butter, and vanilla extract.
- Pour the wet ingredients into the dry ingredients and stir until just combined. Do not overmix.
- Preheat your Oster waffle maker according to the manufacturer’s instructions.
- Pour the appropriate amount of batter onto the preheated waffle iron and cook until golden brown and crispy, typically 3-5 minutes.
- Serve immediately with your favorite toppings!
Enjoy your perfectly cooked waffles made with your reliable Oster appliance!
Belgian Waffle Recipe
Yields: Approximately 3-4 Belgian waffles
Prep time: 15 minutes
Cook time: 20-25 minutes
Ingredients:
- 2 cups all-purpose flour
- 1 tablespoon sugar
- 4 teaspoons baking powder
- ½ teaspoon salt
- 2 cups milk
- 2 large eggs, separated
- 6 tablespoons melted butter
- 1 teaspoon vanilla extract
Instructions:
- Whisk together flour, sugar, baking powder, and salt.
- In a separate bowl, combine milk, egg yolks, melted butter, and vanilla.
- Gradually add wet ingredients to dry, mixing until just combined.
- Beat egg whites until stiff peaks form; gently fold into batter.
- Preheat your Oster Belgian waffle maker.
- Pour batter onto the hot iron and cook until golden and crisp.
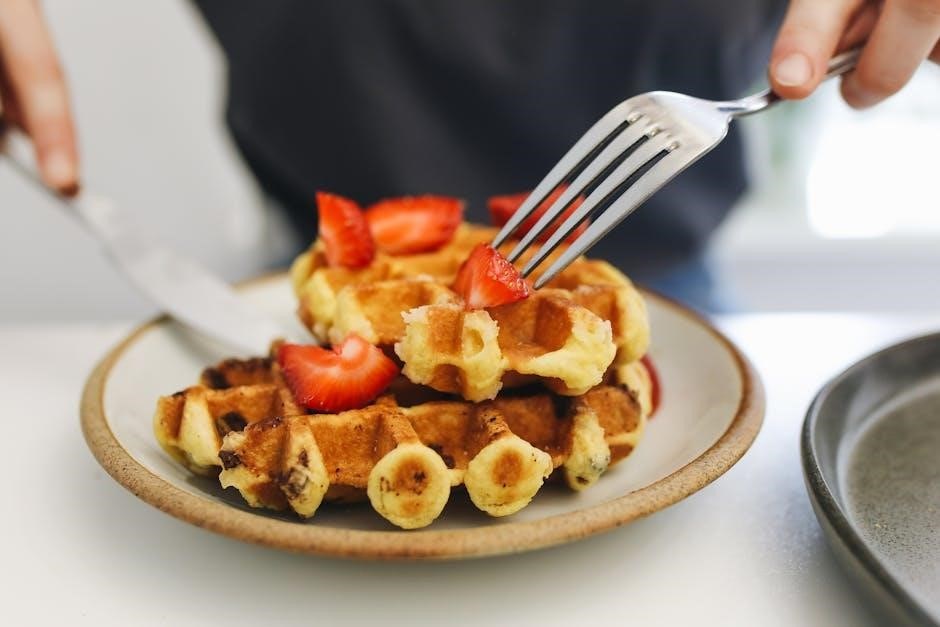
- Serve immediately with fresh fruit and whipped cream!
Your Oster waffle maker will deliver fluffy, delicious Belgian waffles every time.
Savory Waffle Ideas
Beyond sweet treats, your Oster waffle maker unlocks a world of savory possibilities! Explore exciting flavor combinations for brunch, lunch, or a unique dinner.
Chicken & Waffles: A classic! Crispy fried chicken atop a fluffy waffle, drizzled with maple syrup or hot sauce.
Pizza Waffles: Incorporate pizza sauce, mozzarella, and your favorite toppings directly into the batter before cooking.
Cornbread Waffles: Substitute some flour with cornmeal for a hearty, savory base. Pair with chili or pulled pork.
Herb & Cheese Waffles: Add chopped fresh herbs (chives, parsley) and shredded cheddar or parmesan to the batter. Serve with eggs.
Salmon Waffles: Top a waffle with smoked salmon, cream cheese, and capers for a sophisticated brunch option.
Let your Oster waffle maker inspire culinary creativity – savory waffles are surprisingly versatile!
Leave a Reply
You must be logged in to post a comment.